The best DIY Christmas decoration ideas
When it comes to finding the best DIY Christmas decoration ideas that snuggling up at home for a cosy craft day is a wonderful way to spend a cold, rainy day in December.
So, light some scented candles and open a box of chocolates and enjoy getting busy making some of these easy DIY decorations for your Christmas tree.
Oranges studded with cloves – a Christmas pomander
 This simple DIY idea will add a seasonal scent to your home and pay homage to the part oranges play in Christmas. They were the original stocking gift, add flavour to lots of Christmas foods and represent the earth in Christingle services.
- Pick the biggest, roundest and best quality oranges you can find.
- Seek out some 1cm thick ribbon in a colour or pattern of your choice, we think that green looks best with orange.
- Source a big packet of cloves, most supermarkets will stock them in the herbs and spices section.
- Criss-cross the ribbon around the orange. Imagine you’re tying up a present. Don’t cut your lengths of ribbon until you have experimented with the first orange.
- Create a sturdy loop at the top of the ribbon to use for hanging.
- Prick small holes in the orange with a needle either cover the whole surface or make a pattern.
- Stud the pinholes in the orange with the star-shaped cloves to release the citrus scent and add the Christmassy aroma of spice to your home.
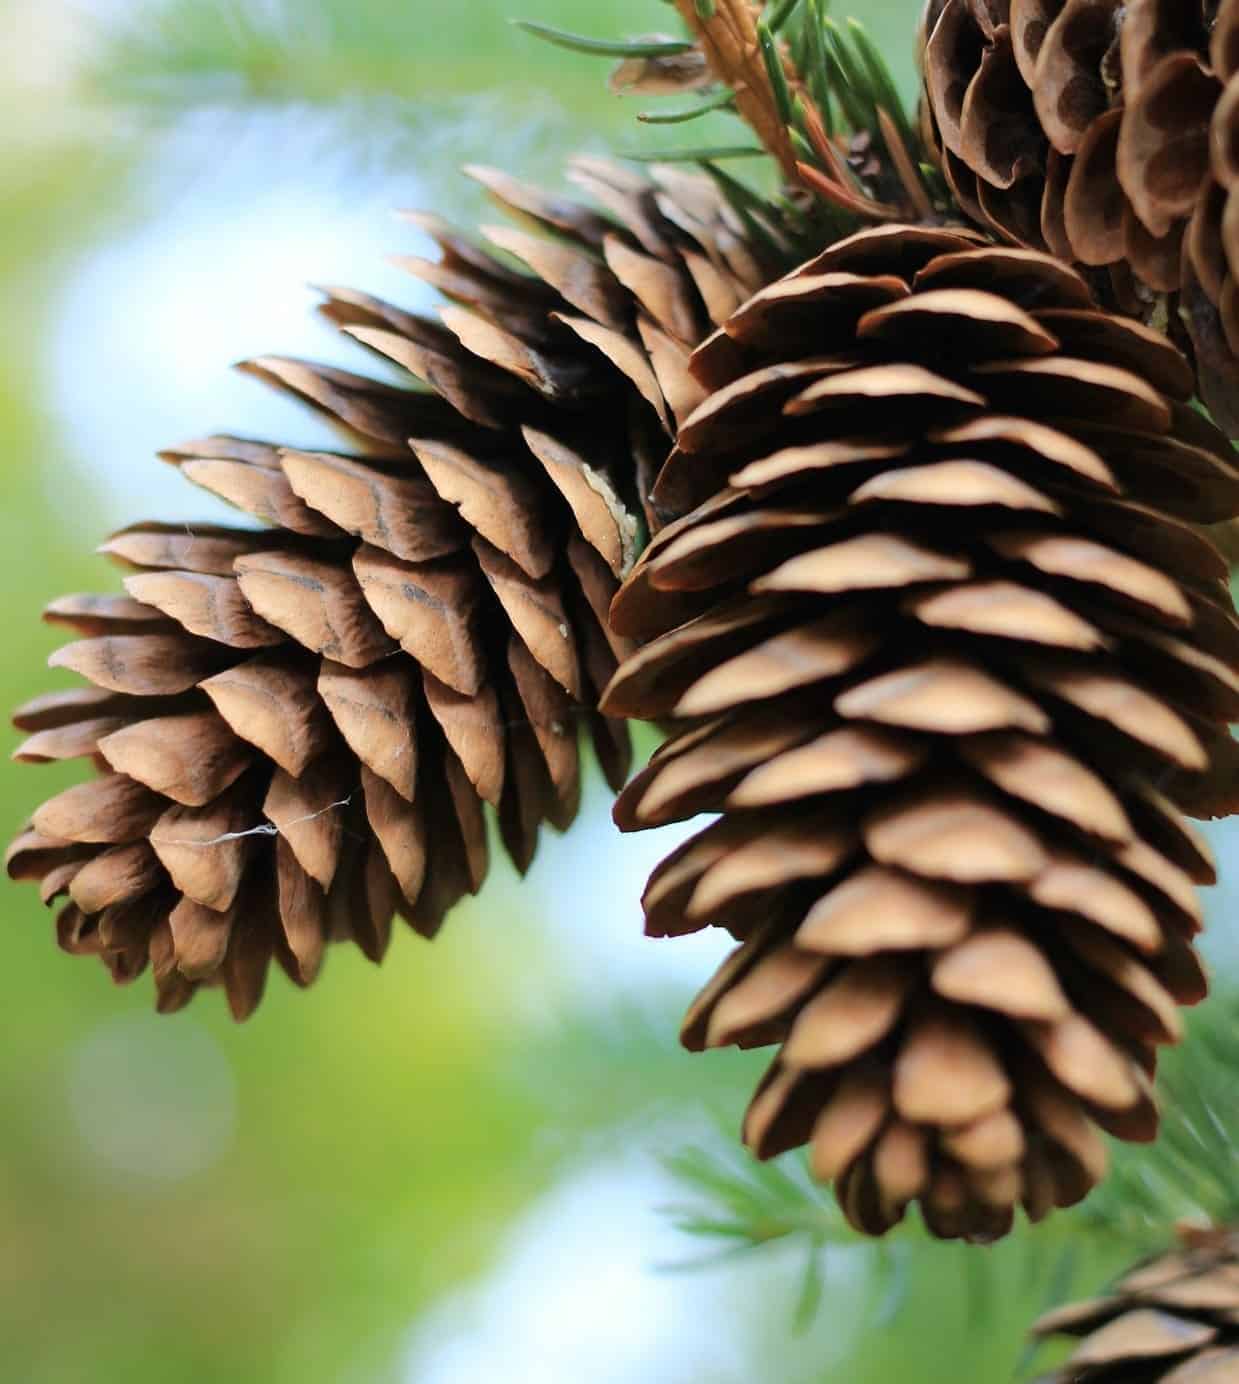
Foraged glittery, scented pinecones
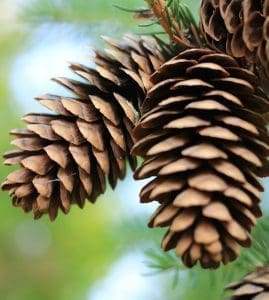 This is the perfect DIY festive decoration to make and enjoy doing so with small children. You’ll have to do a little bit of planning, but It’s so easy and quick!
- On early summer walks in the woods or forest keep an eye on the ground for pinecones.
- Clean them up with warm water.
- If you want a pale surface that will effectively display your embellishments use bleach. Mix a full bottle of cheap bleach with half a bottle of water and leave your pinecones in the solution for 24-48 hours.
- Dry your cones thoroughly and store them in a plastic bag with scented oils such as cinnamon, citrus or ginger.
- Cover your table and/or floor with a protective cloth or newspaper.
- Glitter spray from your local craft shop is the simplest way to add a touch of magic. Alternatively dab craft glue on the tips and roll them in a bowl or glitter or use coloured glitter glue.
- Tie a ribbon to the top of the cone for hanging or arrange them in a bowl.
- Pinecones can be bought as well as foraged during a summer walk so you have your own natural treasure for next year.
Folded festive fabric baubles
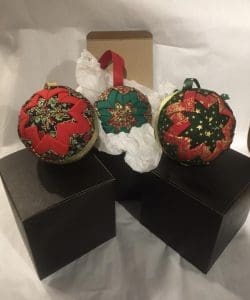 These luxury quilted baubles will look gorgeous nestled in the centre of the Christmas tree. Festive style is usually shiny and metallic, so it’s lovely to add a touch of cosiness to the overall design of your home.
Choose the fabric that will suit your Christmas theme. We think traditional red and white or green and cream will look fantastic as part of a Scandinavian look.
These festive fabric baubles by Craftedbyemybee on Etsy give a great idea or what can be achieved (or you could buy some from the site if you run out of time!).
This is a ‘How to’ video on preparing your festive fabric baubles from Christmas Crafts.
Christmas Card Tree
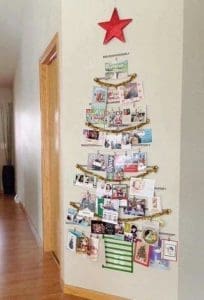 Sending Christmas cards through the post is, sadly, being replaced by festive texts, virtual cards and finding yourself tagged in a social media post.
This image by Patti Steele on Pinterest shows what can be done with some creativity for great DIY Christmas decoration ideas.
Hopefully, your family and friends still make the effort. If they do this is a clever way to display them and your tree will grow as you receive more cards.
- This quirky technique will look best on a plain wall.
- Place rows of cards decreasing in length to create a Christmas tree shape on your wall.
- Use non-marking pads to protect your wallpaper or paintwork.
- A red or green tub filled with presents will look fantastic at the base of your tree.
- Pop a star or angel at the top to finish off the look
Beaded stars
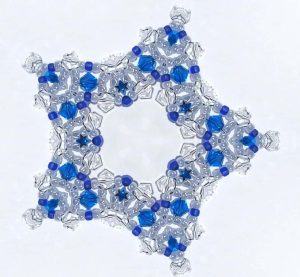 There are SO many options for colours, sizes and styles with these star-shaped ornaments!
- Draw the size of five-point star you require on a piece of paper.
- Take a length of silver craft wire and make a small loop in one end.
- Take your bead of choice, we adore the idea of wooden beads as then your stars can then cheer up your home throughout the year.
- Thread the wire and bend carefully, bit by bit into a star shape using the paper template.
- Feed the end of the wire through the loop, cut and crimp.
- Use ribbon to hang or balance them in the deeper branches of your tree to add depth and texture.
Gift bow wreath
Time and effort are needed for this colourful wreath but it’s worth it for DIY Christmas decoration ideas that have a stunning effect!
 You’ll need a Styrofoam wreath from the craft shop, lots of gift bows, a length of craft wire and a hot glue gun. (If you don’t have a glue gun just use good quality glue and lots of patience.)
- Tie the wire around the top of the wreath for hanging purposes.
- Arrange your bows in clusters of size and colour. We would use three different sizes and a mix of blue, silver and white for a frosty look. Alternatively, red, green and gold will provide a classic Christmas theme.
- Stick the bows to the wreath with a generous blob of glue and 10-15 seconds of pressure.
- Think carefully about where you place the bows. Keep them close together and mix sizes and colours.
This Christmas bow wreath creation from Anthony Crammen on Pinterest shows how great this idea is.
Anthony also has a YouTube channel and his video below shows how to make one of these impressive wreaths.
Homemade Christmas Tree Bunting
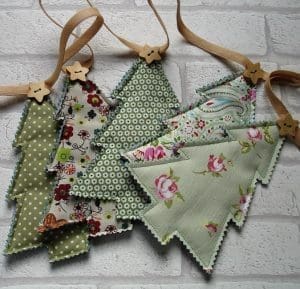 Crisp cotton and a sewing machine will be needed to give these a neat finish. However, if you’re hoping for a more rustic look, or it’s a project for children then chunkier fabric, such as felt, and a hand-sewn blanket stitch would look great too.
We love this Christmas tree bunting (pictured) from sewdainty – it just goes to show what can be achieved!
- Draw a template of a tree on a piece of paper and cut it out.
- Place the template on some scrap fabric, draw around it and cut out.
- Cut a square of your patterned bunting fabric, your plain backing fabric and the wadding making sure they are at least one inch bigger than the tree template all the way around.
- Stack backing fabric, a square of wadding and a square of bunting fabric and pin the tree template to the top of the stack.
- Carefully sew around the template using your sewing machine.
- Trim the excess fabric as close to the stitches as you can with pinking shears.
- When all your trees are finished, sew them evenly along the length of a piece of thick ribbon or cotton twill tape.
- Cover the top of each tree, where the stitches are, with a star-shaped button.
Candy baubles
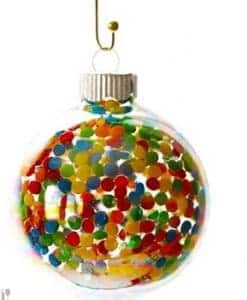 When it comes to DIY Christmas decoration ideas, we were thrilled with the fun-finished effect of these colourful baubles. They would look fabulous on a child’s bedroom tree or as the only ornaments on funky coloured branches.
This picture is from GimmeSomeOven who has created an excellent sprinkles ornaments.
Here are the supplies you’ll need:
Clear, shatterproof baubles, clear varnish, colourful hundreds and thousands (sprinkles), strong thread or coloured string for hanging, two funnels or sandwich bags.
- Remove the top of your bauble.
- Pour a teaspoon of varnish into the clear bauble. Use a funnel or pour the varnish into a sandwich bag with a small hole in one corner.
- Gently swirl the varnish around the bauble.
- Pour sprinkles into the bauble using the same method as with the varnish.
- Swirl the sprinkles so that they stick to the varnish on the inside of the bauble.
- Pop the top of the bauble back on and tie your string to the loop.